What to bring Bushwalking in Tasmania?
This article is lengthy and rather detailed. For those with limited time and/or attention here is the equipment you need in a nutshell –
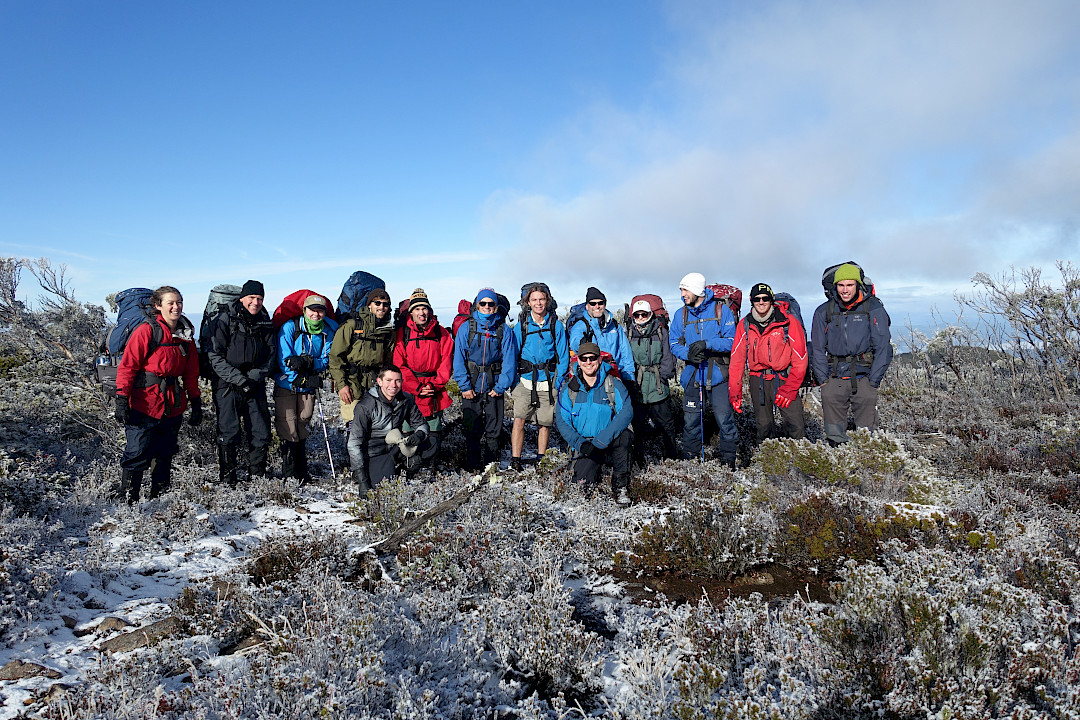
- Clothes – 2 sets. One for walking in (will get wet and muddy) one for around camp that must stay dry. Only synthetic or wool clothes as these remain warm when wet. No cotton!!! Need to include full head to toe rain protection and a warm beanie, gloves, hat along with appropriate walking shoes/boots for the conditions.
- Backpack – Big enough to hold your equipment, needs to fit you well (go to a shop and get one fitted or ask an experienced friend) and keep your gear protected and waterproof. Take a pack liner, plastic bags or dry bags to line the pack.
- Tent/sleeping gear – Need shelter, a sleeping mat and a sleeping bag. Pillow optional. Must be appropriate for the weather conditions. Sleeping bag can be down or synthetic. If concerned about getting it wet take synthetic as will stay warm when damp. Sleeping mat is essential to insulate you from the ground.
- Food/cooking – Need plenty of calorie-dense food. Olive oil, peanut butter, trail mix and dense carbohydrates like rice, oats and couscous are your friend. Make sure your stove is light and can handle the weather conditions. Don’t forget a fork/spoon.
- Toiletries – Toothbrush, toothpaste, sunscreen, toilet paper and trowel.
- Walking-specific gear – Maps, a compass notes about your intended route if available. A good head torch with charged batteries.
- Emergency gear – First aid kit, Personal Locater Beacon/Epirb/satellite phone, repair kit, emergency navigation gear, some sweet snacks and emergency food. The trip leader should generally organise and carry all of this equipment.
For those in for the long haul below is a much more detailed article with my recommendations on bushwalking kit…
Equipment is a very personal matter which varies wildly depending on the conditions of your trip, the objectives and your personal preferences. No amount of reading and listening to the recommendations of others will compare to taking a bunch of equipment out and testing it in the field. This should be in conditions that are as miserable if not more so than the conditions you could end up facing on the trips you choose to go on.
That said, for the uninitiated some general guidelines can be helpful to get you in to the pastime without having to waste a bunch of money on useless gear and minimise the amount of radically unpleasant experiences in the outdoors you have.
This article makes several key assumptions that if not true render the information largely useless those are:
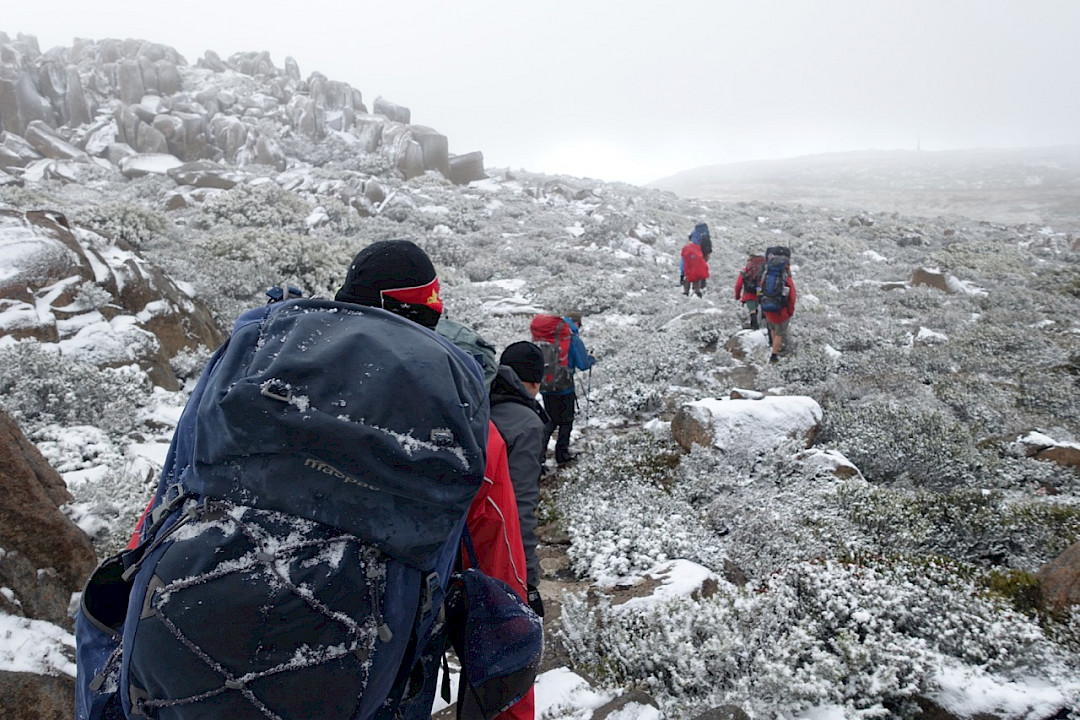
- You are expecting to be facing typical Tasmanian bushwalking conditions. That means that you are walking in thick scrubby rainforest or alpine areas with lots of mud and the potential for freezing cold conditions, rain and snow all year around. This radically reduces the value of fire lighting as an emergency heat source, almost guarantees your walking clothes will become wet and muddy and minimises the importance of carrying large amounts of water because most of your trip will be spent wishing it would stop raining!
- You have appropriate training and experience to use all relevant equipment or at the very least are part of a team with people that can (there is very little utility in bringing maps and a first aid kit if you have no clue how to use them).
- You are on a multi-day walk or in a remote area. If you are on a short day walk in an easily accessible location within phone reception all of this equipment will be significantly overkill. This guide assumes that you need to be entirely self-sufficient in the event that things go wrong.
Clothing
When walking you need two full sets of clothes. One for walking in (which will inevitably get muddy, grimy and wet) and another dry set which you will use at camp when you are in your shelter and out of the rain. This dry set must be kept in a waterproof bag of some sort, personally I double up and use several layers of protection. If you are on an extended trip then carrying an extra set of socks and underwear may be beneficial so you can rotate and have a set that you wash and hang on your pack to dry.
The most critical consideration with clothing is the material. Everything you have must be either wool, synthetic or a blend of the two. Any sort of plant fabric like cotton, hemp etc will be very cold when wet and take ages to dry. Us guides have a saying ‘Cotton Kills’ and it’s for good reason. As unpleasant as being soaked head to foot is if you have wool and synthetic layers they will keep you warm despite being saturated and will eventually dry out with your body warmth. Even for around camp cotton clothing is not suitable for bushwalking and you need to be careful as it’s in a lot of underwear, socks and shirts.
A typical rookie mistake is to treat a bush walk like traveling and pack as many t shirts as days you will be out. This is silly as you just end up with a pack full of wet t shirts (heavy) and they’re totally useless for keeping you warm if it gets really cold. Avoid unnecessary duplicate clothing items and instead pack versatile clothing pieces that will keep you warm in any conditions and that can all be layered if the conditions warrant it.
If you are new to bushwalking, are concerned about getting clothes wet or are leading a group and need emergency warm clothes certainly throw in an extra set of warm clothes in a waterproof bag. Conversely the experienced may be able to get by with less clothes. For ultra light trail running missions I often will take very little in the way of dry clothes as when I am at camp I only need a set of dry shorts and socks as I will be in my sleeping bag which is dry and will keep me warm.
One of the more contentious items of clothing is footwear. I’ve seen highly experienced and competent outdoors people do everything from walk barefoot to wear gumboots. For those with little experience I would generally recommend a good set of bushwalking boots purchased from a good outdoors shop as a safe option. Keep in mind that unless you are on well formed tracks these will end up soaked through so prioritise boots that will dry quickly and that are light (which in turn minimises fatigue and the risk of slips trips and falls). That said if you can’t afford boots and have a fairly light pack don’t be afraid to head out in your sand shoes/runners. They will do the job just fine providing you are used to doing physical activity in them. Just remember they will probably end up soaked so make sure whatever you are wearing will handle that. Also remember that the lack of ankle support in running shoes may be an issue if you are not used to moving over rough terrain in them or are carrying significant weight.

Backpack
Having had the experience of walking for a week with most of the skin missing off my back while carrying 50+ kg I can attest to the suffering that a poor decisions in this department can cause. Packs need to fit correctly. If you don’t know how to check for this go to a good outdoors shop or ask an experienced friend. Packs also need to protect your equipment and keep everything dry. To do this generally you will need a pack liner and/or waterproof bags to give multiple layers of waterproofing to protect your gear. If in doubt throw in extra garbage bags. These are excellent and versatile pieces of gear for everything from keeping stuff dry to serving as emergency rain jackets.
There are many different types of packs from fanny packs for trail running to massive 100+ litre expedition packs that can carry a month’s work of food and gear. You need to pick a size and style that makes size for the type of trip you are going on. If you can only have one pack something the the 45–60 litre area is probably best as it can be used as both a day pack and as a multi-day trip option. Going in to a good outdoors store and asking for advice there is is a good idea if you don’t know what to get although buying second hand is a great way to save money and the earth’s resources so I’d highly recommend it if you can.
High quality packs like those made by One Planet will last an age and are often up on Gumtree or Facebook groups second hand for very cheap. More lightweight options made by companies like Osprey and ultra light gear manufacturers are better if you’re looking to keep weight down but are less durable so will hold up to less scrub bashing. I’ve used packs from a massive array of companies and can’t offer a comprehensive view on the subject here. Best to Google any model of pack you are looking at and see what people think or ask an experienced friend.
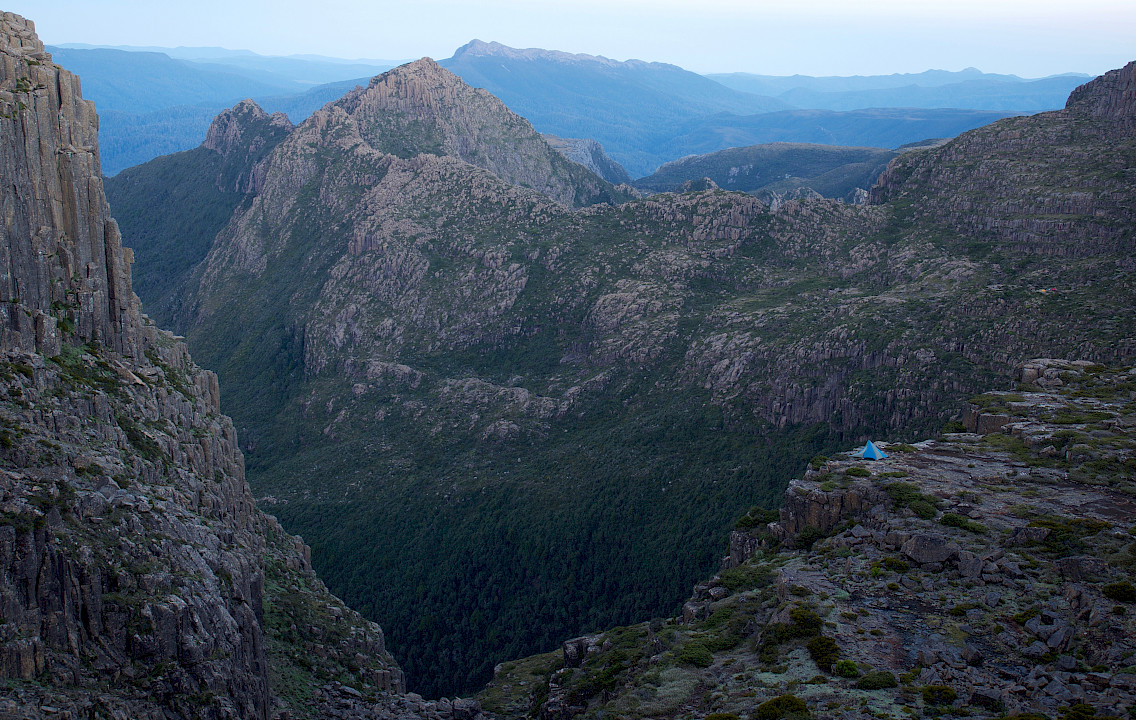
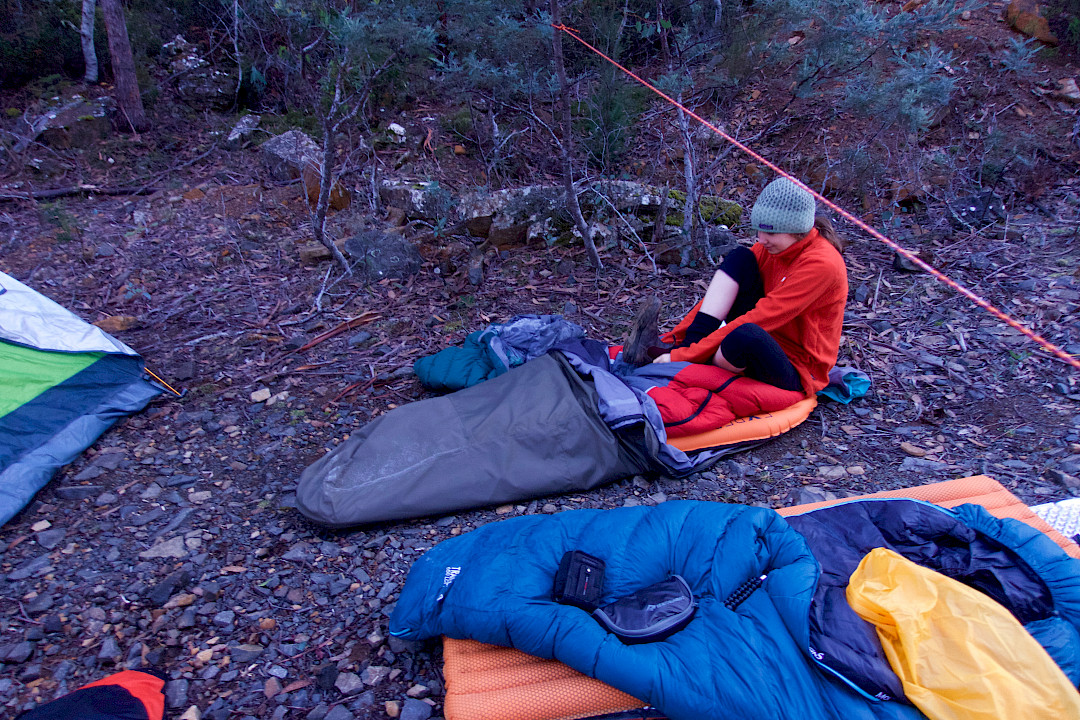
Shelter
Shelter is a very critical element of your walking kit being essential for comfort as well as safety. There are many options including tents, bivvy’s, tarps and hammocks. For beginners tents are generally the safest option being the least difficult to set up correctly and the most reliable for getting people out of bad weather. They also serve as a passable emergency shelter for multiple people which bivvy’s and hammocks don’t do. If I am traveling light and fast then a bivvy and or a tarp would be my preference due to weight. That being said an emergency shelter option is essential and if I am carrying a bivvy when leading a trip I will be carrying some sort of tarp or bothy bag in case I need to quickly get everyone out of the weather. Make sure your tent is rated for the weather conditions you will be facing and is also light enough to be able to carry.
Sleeping kit
There are two critical elements to getting a good night’s sleep in the outdoors, a sleeping bag/quilt and a sleeping mat.
Sleeping bags are fluffy insulation (either down or synthetic) inside a fabric liner that keep you warm as you sleep. It is important to note that these work only when they are fluffy and trapping warm air. This is why you need a sleeping mat. Insulation that is compressed underneath you when sleeping does nothing to keep you warm. Likewise down insulation that gets wet and loses its loft will not keep you warm. Make sure your sleeping bag is rated to below the worst temperature conditions you could face. It is essential to keep your sleeping bag dry (pack it in a plastic bag or similar). If there is any doubt about your ability to keep it dry then you should use a synthetic bag which while more heavy and bulky will retain warmth when wet.
Sleeping mats are important for both comfort and warmth. A good mat insulates you from the cold ground keeping you warm. Unlike sleeping bags mats are rated on r value rather than temperature ratings. As a general guide anything under r2 is exclusively for summer use, r3–4 is fine for general use (3 seasons) and r4+ a requirement for winter trips in snow. There are three types of mat, foam, self-inflating and inflatable.
- Foam are the least comfortable but are very reliable, cheap and impossible to puncture. Excellent for emergency use as you can throw them on rocks and instantly separate a casualty from cold ground. Also can be cut up and used for splints or form part of an improvised stretcher. The main downside is that they are very bulky.
- Self-inflating are a middle ground between foam and inflatable mats. They are comprised of an airtight skin with a foam in between that is compressible. When you want to use your mat you undo the valve and the foam expands filling with air. You may need to top up with a little extra air. These are common and perfectly acceptable but personally I am not a big fan, they’re still fairly bulky and heavy but offer no advantages over a fully inflatable mat other than ease of inflation.
- Inflatable mats are the lightest and most compact option. They’re very comfortable and range widely in r value. Main downside is that they lack durability and need to be looked after. Many people complain about them being a pain to inflate however an inflation bag mitigates that frustration and also doubles as a dry bag to keep the moisture out.
If I am going out by myself in 3 season conditions I will take a inflatable mat. If I am going out in winter or am leading a trip I will take both a thin foam mat and a lightweight inflatable mat. This gives me enough r value to keep me warm and comfortable. Many would consider this overkill but I am happy to carry the extra weight for the resilience of the system and versatility for emergency situations.
Providing you have the sleeping bag and mat you’ve got all the essentials covered. A pillow is optional, you can buy inflatable ones or just use a bundle of clothes in a bag. Likewise if you get cold feet or a cold head you will want to throw in a spare beanie and warm socks.
Food/Cooking
Good food makes a big difference when out on the trail. Never underestimate the moral boosting power of a good hot meal when you’re cold, wet and dispirited.
When planning your food make sure you pack more calories than you would normally consume on a daily basis. This is to factor in recovery from the exertion of long days of walking.
I won’t get in to details about nutrition as it isn’t my area of expertise. That said here are some ideas at to the types of food that work well in that they are light, calorie dense and easy to prepare.
Breakfasts – Porridge, muesli, cereal, milk powder and hot drinks are excellent options. You want food that is quick to prepare but that is hot to get everyone warm and fuelled up for a big day of walking.
Lunches – Tortillas and wraps with peanut butter, hummus salami cheese and maybe some salad if you can get it. You want a calorie rich lunch that is quick to prepare even in poor weather. The last thing you need is to have to try and make an elaborate lunch when it’s pouring with rain and you don’t have time to set up a tent.
Dinner – Instant freeze dried meals are a low effort but high cost option. For the cheapskates like myself I recommend choosing a base of some sort of carbohydrate and adding dry vegetables and protein to it to add to the flavour profile and nutrition. Here are some of my go to options the ingredients for which can all be purchased in the supermarket –
- Mashed potatoes with beef and gravy (instant mashed potatoes + dehydrated peas served with jerky, dehydrated mince and instant gravy)
- Creamy pasta with tuna and vegetables (ready made Alfredo pasta mix, milk powder, dehydrated peas and a sachet of tuna)
- Asian style noodle soup (2 minute noodles with tomato soup sachets, olive oil, dehydrated peas, onion, shallots and shiitake mushrooms with a sachet of tuna)
- Trail couscous (Couscous with olive oil, dehydrated chickpeas + any dehydrated vegetables you like, sultanas, peanuts, cashews, garlic and onion powder and dried herbs)
If you really get in to it a dehydrator is a great way to improve your meals allowing you to take a heap of different types of vegetables that you wouldn’t otherwise be able to bring. Also it allows you to dry out canned tuna which is probably the lightest and cheapest protein you can get for an extended trip (remember it’s low in fat though so you need to add olive oil).
You also need to make sure you have appropriate utensils, pots and stoves for your meal and cooking needs. Different stoves suit different weather conditions. Read some reviews and make sure you have a suitable model for what you are doing. Also ensure you have a minimum of three ways to light it, all protected in seperate waterproof bags. Pot materials are worth considering. Titanium is the lightest material but generally poor for cooking involving much more than boiling water. Stainless steel is better for cooking, more durable but heavier. Aluminium somewhere between the two and is better for cooking in but personally I am not a fan due to reduced durability.
It would be amiss to not mention water. Clean drinking water is essential for life and ensuring you have enough is a critical element of your planning. Depending on the area you are walking in you may need to bring a water filter to clean drinking water of contaminants. Examine maps and research the region you are going in to so that you can plan the points you can fill up your water bottles. Water consumption depends a lot on weather conditions and level of exertion. A bare minimum of two litres of water per person per day is a reasonable rule of thumb.

Toiletries
Bring whatever you need to keep yourself clean and healthy while minimising weight and unnecessary rubbish. The basics are hand sanitiser, toothbrush, toothpaste, toilet paper (and a trowel or similar to dig a toilet hole), tampons/pads (I always have some in the group first aid kit when leading a trip) sunscreen and some rudimentary medical bits (disinfectant, bandaids etc). A quick tip is to keep your toilet paper and a small bottle of hand sanitiser in with your tent stakes. Much more hygienic than having it in your toiletries kit next to your toothbrush!

Walking-specific gear
Detailed topographic maps, a compass, notes about your intended route if available etc. While sole reliance is a poor idea, mobile phones are becoming more and more useful in the outdoors. You absolutely must download offline maps on to the phone as you very rarely will have reception. Offline google maps, and maps.me despite being primitive and not showing topography will do the job for following well trodden trails as a secondary navigation option to a physical map. A good head torch with charged batteries is very important both for around camp and for night walking. If there is any serious potential for significant walking in the dark a minimum of two should be carried. Head torches are also an important consideration when packing your emergency kit as having the capability to be mobile after the sun has gone down is very important.

Emergency gear
This article is targeted at beginners so I won’t go in to much detail here as this is equipment that the leader of a trip should have well in hand. Equipment also varies very significantly depending on your group and what kind of conditions you may be facing. At minimum your team should be carrying an emergency communications device (Personal locater beacon or satellite phone), a solid first aid kit, emergency shelter (which may be your tent if suitable), repair materials for fixing broken gear, a spare map/compass/GPS and extra food in case you end up stranded. As a beginner on a trip with a experianced leader focus your attention on bringing spare warm clothes, food and repair gear.
It is worth mentioning that bushwalking is an overwhelmingly safe pastime and one of the lowest risk activities I partake in. Planning for worst case scenarios is not something that should induce anxiety or be written off as paranoia but provide you with the confidence to know that if things don’t go according to plan then everything will be ok. When I think of the best trips I have been on all of them without fail have gone badly wrong in one part or another. Resilience, training and good preparation is what makes these experiences tough but incredible rather than unmanageable and disastrous.

Last modified: